See the supported connectors for Application Integration.
Configure test cases
This document describes how to configure test cases for your integrations. For information about test cases, supported test configurations, and its limitations, see Introduction to test cases.
Before you begin
-
To get the permission that you need to configure test cases, ask your administrator to grant you the Application Integration Editor (
roles/integrations.integrationEditor) IAM role on project. For more information about granting roles, see Manage access to projects, folders, and organizations.This predefined role contains the
integrations.googleapis.com/testCases.createpermission, which is required to configure test cases.You might also be able to get this permission with custom roles or other predefined roles.
- Ensure that your integration is in the
DRAFTstate. If your integration is in thePUBLISHEDstate, click Enable Editing. A new version in theDRAFTstate is created in the integration for you. The following figure shows the edit lock in the integration editor.
- Ensure that you have a test case in the integration. For information about how to create a test case, see Create Test Cases.
Configure test configurations for triggers
To configure the test configurations for the trigger, select one of the following options:- In the Google Cloud console, go to the Application Integration page.
- In the navigation menu, click Integrations.
The Integrations page appears listing all the integrations available in the Google Cloud project.
- Select an existing integration for which you want to create a test.
This opens the integration in the integration editor.
- Click Test Case and then click Open test cases. The Test Cases pane appears with a list of test cases for the current integration version.
- Select the test case from the list.
In the Integration editor page, the designer canvas displays Test case mode is active. The following image shows the Test configuration pane for the trigger:
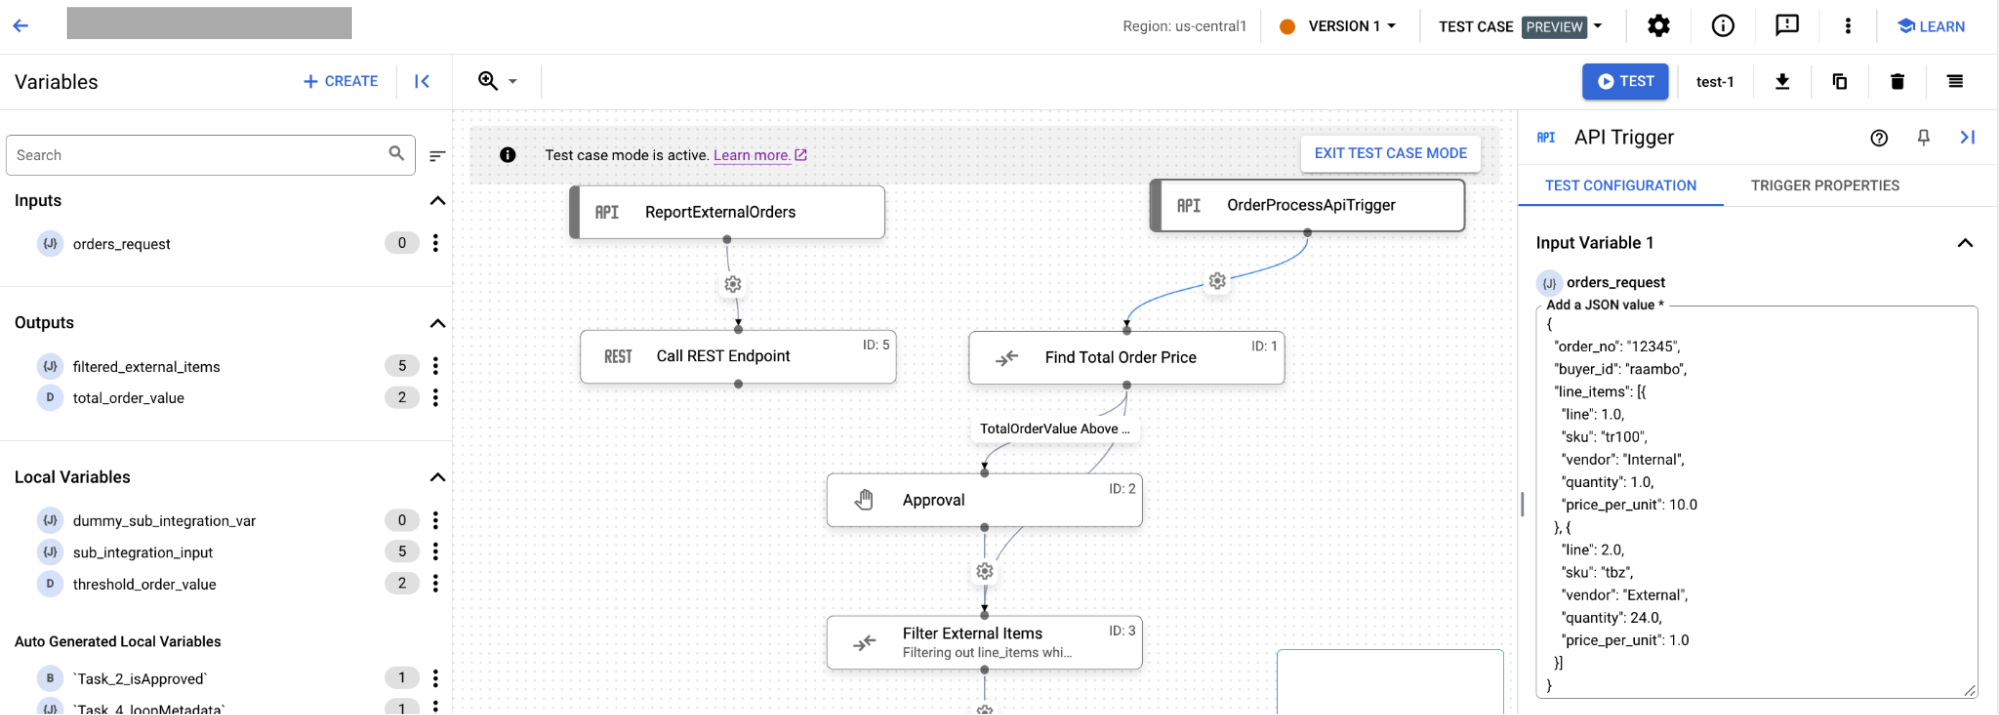
- In the Integration editor page, click the trigger to open the trigger configuration pane. Then, do the following:
- If you have input variables for your integration, then the Test configuration tab shows those input variables. The values that you enter in the variables are saved automatically.
- To view the trigger properties, click the Trigger properties tab.
Configure test configurations for tasks
To configure the test properties for the integrations task, select one of the following options:- In the Google Cloud console, go to the Application Integration page.
- In the navigation menu, click Integrations.
The Integrations page appears listing all the integrations available in the Google Cloud project.
- Select an existing integration for which you want to create a test.
This opens the integration in the integration editor.
- Click Test Case and then click Open test cases. The Test Cases pane appears with a list of test cases for the current integration version.
- Select the test case from the list.
In the Integration editor page, the designer canvas displays Test case mode is active.
- In the Integration editor page, click the task to open the test configuration pane. The following image shows the Test configuration pane for the task:
In the Test configuration tab, follow these steps: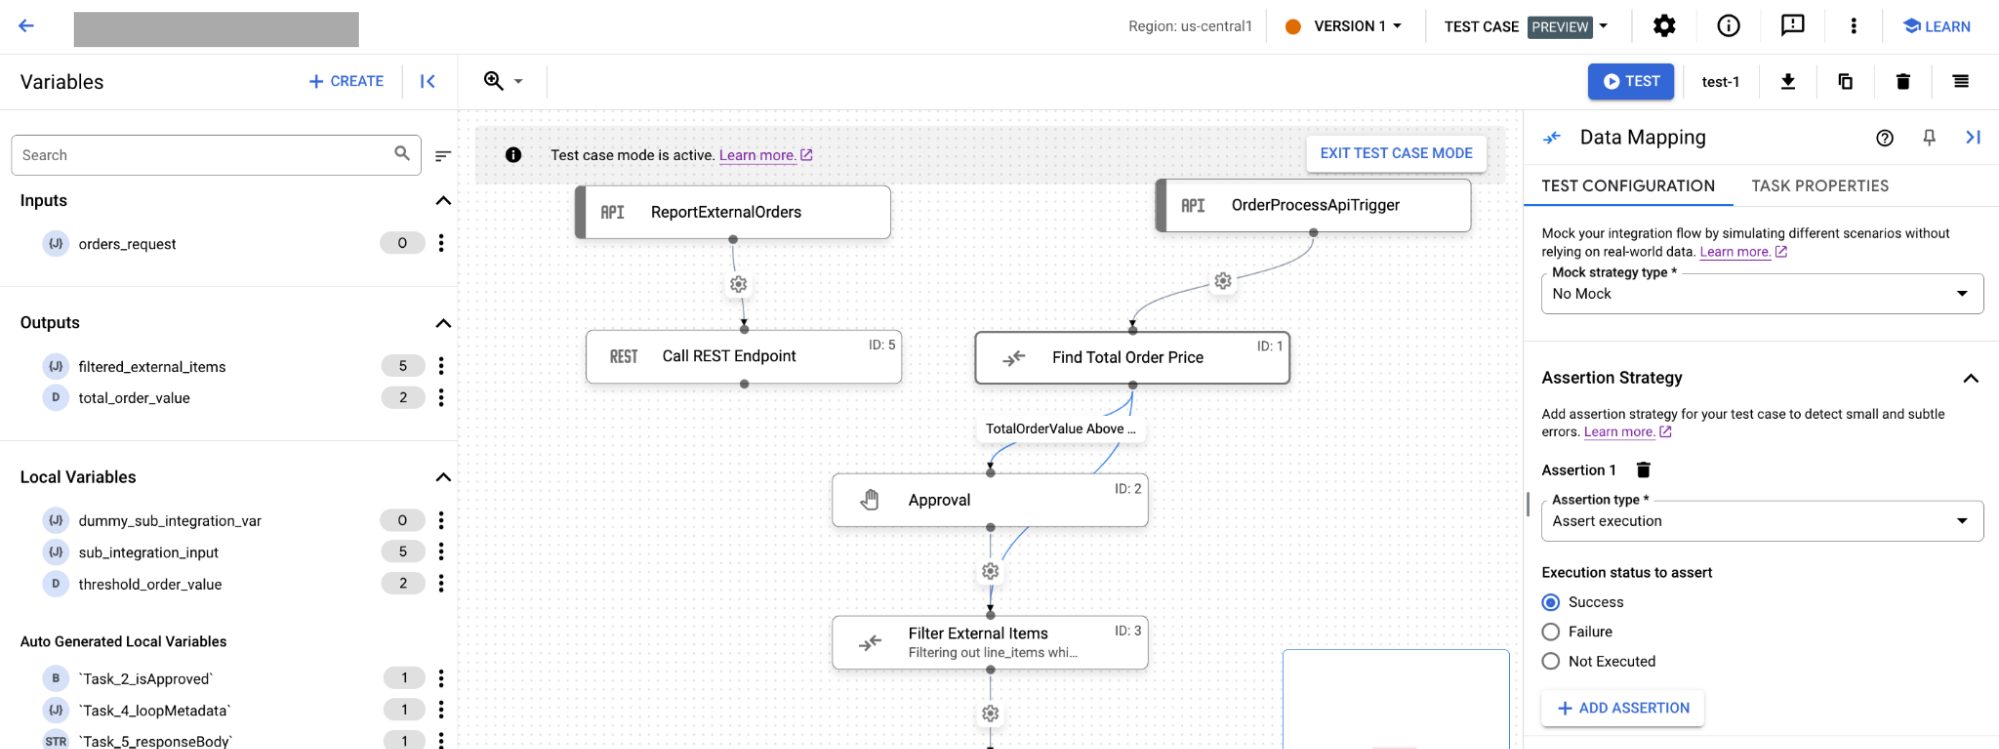
- From the Mock strategy type, select one of the following mock strategies:
- If you select No mock, then your task executes from the main integration as it should in the actual integration. By default, No mock strategy type is selected for tasks.
- If you select Mock execution, then for Mock execution status, you must select one of the following:
- Skip: Task is marked as successfully completed
- Failure: Task is marked as failed
- If you select Mock Output, then for Task Output list, you must provide the output of the tasks for the next node in the integration.
- From the Mock strategy type, select one of the following mock strategies:
- In the Assertion strategy section, do the following:
- From the Assertion type field, select one of the following options:
- If you select Assert execution, then select one of the following options for Execution status to assert:
- Success
- Failure
- Not executed
- If you select Assert parameters, then do the following:
- From the Parameters to assert select if you want to assert parameters including input and output parameters.
- Select the Operator for comparing the asserted parameter with the entered value. The operations to compare the asserted parameter can be one of the following:
- Equals
- Not equals
- Contains
- In the Value field, enter the value to which you want to compare the parameter.
- If you select Assert execution, then select one of the following options for Execution status to assert:
- Optional: To add more assertions, click + Add Assertion.
- From the Assertion type field, select one of the following options:
What's next
- Learn about test cases.
Learn how to do the following:
- Create test cases.
- Copy and delete test cases.
- Run a test case and view test case execution logs.
- Upload and download test cases.