Objectives
This tutorial shows you how to:
- Create a Dataproc cluster, installing Apache HBase and Apache ZooKeeper on the cluster
- Create an HBase table using the HBase shell running on the master node of the Dataproc cluster
- Use Cloud Shell to submit a Java or PySpark Spark job to the Dataproc service that writes data to, then reads data from, the HBase table
Costs
In this document, you use the following billable components of Google Cloud:
To generate a cost estimate based on your projected usage,
use the pricing calculator.
Before you begin
If you haven't already done so, create a Google Cloud Platform project.
- Sign in to your Google Cloud account. If you're new to Google Cloud, create an account to evaluate how our products perform in real-world scenarios. New customers also get $300 in free credits to run, test, and deploy workloads.
-
In the Google Cloud console, on the project selector page, select or create a Google Cloud project.
-
Make sure that billing is enabled for your Google Cloud project.
-
Enable the Dataproc and Compute Engine APIs.
-
In the Google Cloud console, on the project selector page, select or create a Google Cloud project.
-
Make sure that billing is enabled for your Google Cloud project.
-
Enable the Dataproc and Compute Engine APIs.
Create a Dataproc cluster
Run the following command in a Cloud Shell session terminal to:
- Install the HBase and ZooKeeper components
- Provision three worker nodes (three to five workers are recommended to run the code in this tutorial)
- Enable the Component Gateway
- Use image version 2.0
- Use the
--propertiesflag to add the HBase config and HBase library to the Spark driver and executor classpaths.
gcloud dataproc clusters create cluster-name \
    --region=region \
    --optional-components=HBASE,ZOOKEEPER \
    --num-workers=3 \
    --enable-component-gateway \
    --image-version=2.0 \
    --properties='spark:spark.driver.extraClassPath=/etc/hbase/conf:/usr/lib/hbase/*,spark:spark.executor.extraClassPath=/etc/hbase/conf:/usr/lib/hbase/*'
Verify connector installation
From the Google Cloud console or a Cloud Shell session terminal, SSH into the Dataproc cluster master node.
Verify the installation of the Apache HBase Spark connector on the master node:
ls -l /usr/lib/spark/jars | grep hbase-spark
-rw-r--r-- 1 root root size date time hbase-spark-connector.version.jar
Keep the SSH session terminal open to:
- Create an HBase table
- (Java users): run commands on the master node of the cluster to determine the versions of components installed on the cluster
- Scan your Hbase table after you run the code
Create an HBase table
Run the commands listed in this section in the master node SSH session terminal that you opened in the previous step.
Open the HBase shell:
hbase shell
Create an HBase 'my-table' with a 'cf' column family:
create 'my_table','cf'
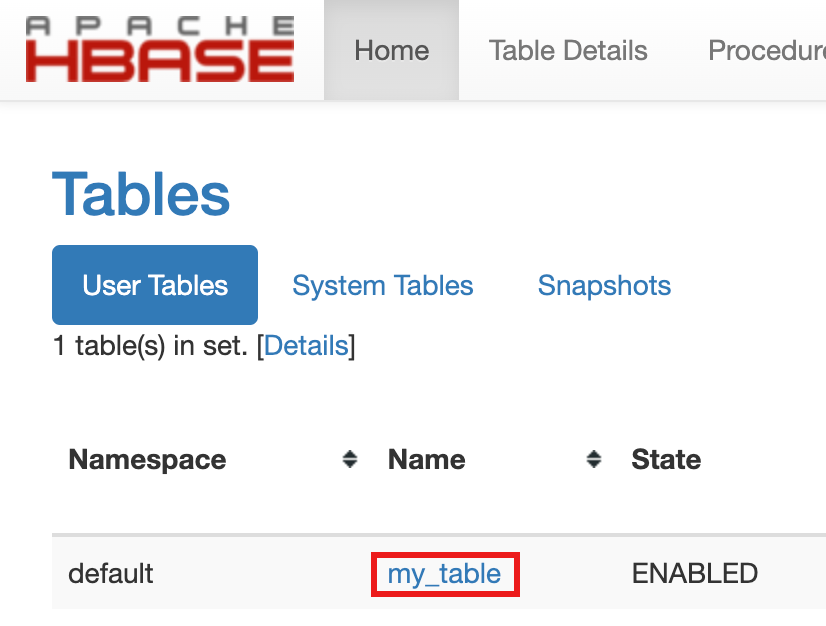
- To confirm table creation, in the Google Cloud console, click HBase
in the Google Cloud console Component Gateway links
to open the Apache HBase UI.
my-tableis listed in the Tables section on the Home page.
- To confirm table creation, in the Google Cloud console, click HBase
in the Google Cloud console Component Gateway links
to open the Apache HBase UI.
View the Spark code
Java
Python
Run the code
Open a Cloud Shell session terminal.
Clone the GitHub GoogleCloudDataproc/cloud-dataproc repository into your Cloud Shell session terminal:
git clone https://github.com/GoogleCloudDataproc/cloud-dataproc.git
Change to the
cloud-dataproc/spark-hbasedirectory:cd cloud-dataproc/spark-hbase
user-name@cloudshell:~/cloud-dataproc/spark-hbase (project-id)$
Submit the Dataproc job.
Java
- Set component versions in
pom.xmlfile.- The Dataproc
2.0.x release versions
page lists the Scala, Spark, and HBase component versions installed
with the most recent and last four image 2.0 subminor versions.
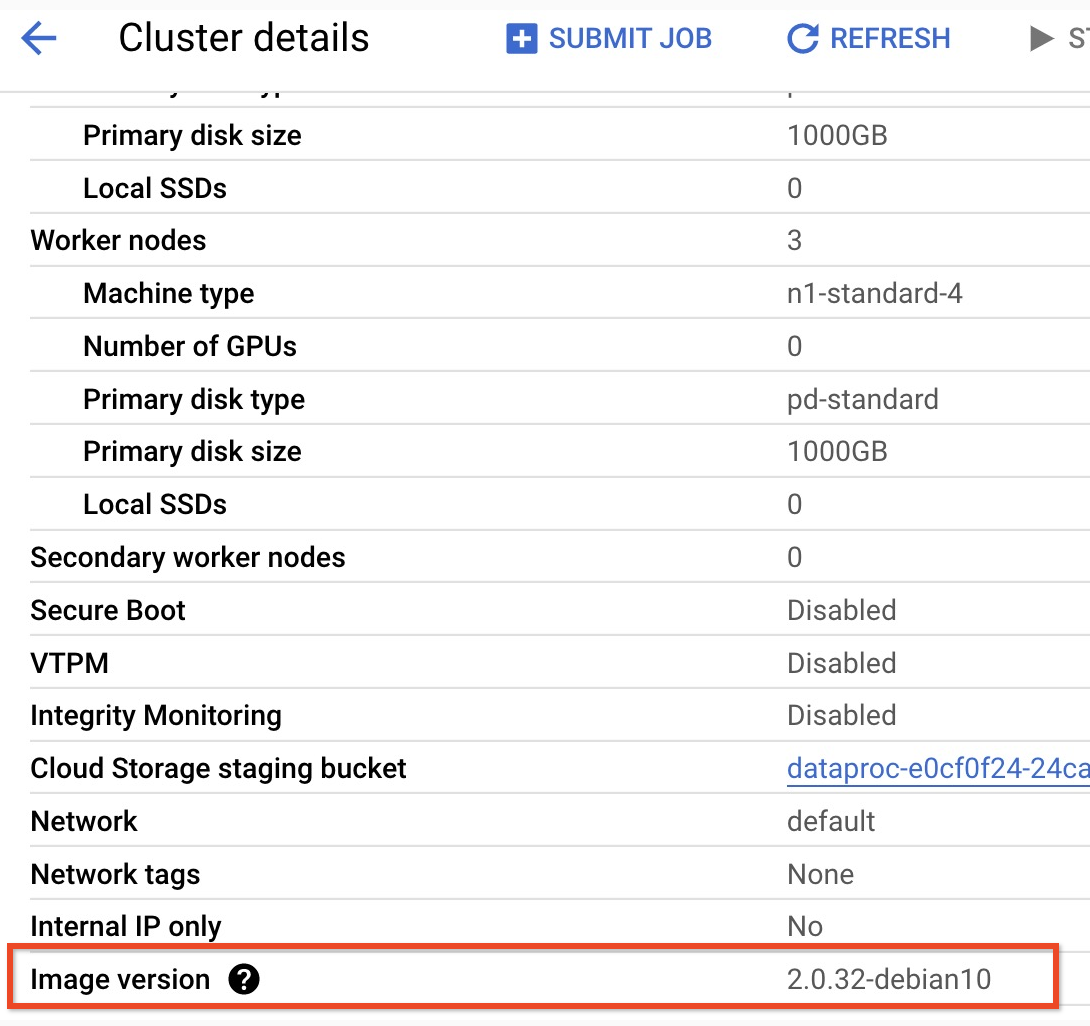
- To find the subminor version of your 2.0 image version cluster,
click the cluster name on the
Clusters page in the
Google Cloud console to open the Cluster details page, where the
cluster Image version is listed.

- To find the subminor version of your 2.0 image version cluster,
click the cluster name on the
Clusters page in the
Google Cloud console to open the Cluster details page, where the
cluster Image version is listed.
- Alternatively, you can run the following commands in an
SSH session terminal
from the master node of your cluster to determine component versions:
- Check scala version:
scala -version
- Check Spark version (control-D to exit):
spark-shell
- Check HBase version:
hbase version
- Identify the Spark, Scala, and HBase version dependencies
in the Maven
pom.xml:<properties> <scala.version>scala full version (for example, 2.12.14)</scala.version> <scala.main.version>scala main version (for example, 2.12)</scala.main.version> <spark.version>spark version (for example, 3.1.2)</spark.version> <hbase.client.version>hbase version (for example, 2.2.7)</hbase.client.version> <hbase-spark.version>1.0.0(the current Apache HBase Spark Connector version)> </properties>
hbase-spark.versionis the current Spark HBase connector version; leave this version number unchanged.
- Check scala version:
- Edit the
pom.xmlfile in the Cloud Shell editor to insert the the correct Scala, Spark, and HBase version numbers. Click Open Terminal when you finish editing to return to the Cloud Shell terminal command line.cloudshell edit .
- Switch to Java 8 in Cloud Shell. This JDK version is needed to
build the code (you can ignore any plugin warning messages):
sudo update-java-alternatives -s java-1.8.0-openjdk-amd64 && export JAVA_HOME=/usr/lib/jvm/java-8-openjdk-amd64
- Verify Java 8 installation:
java -version
openjdk version "1.8..."
- The Dataproc
2.0.x release versions
page lists the Scala, Spark, and HBase component versions installed
with the most recent and last four image 2.0 subminor versions.
- Build the
jarfile:mvn clean package
.jarfile is placed in the/targetsubdirectory (for example,target/spark-hbase-1.0-SNAPSHOT.jar. Submit the job.
gcloud dataproc jobs submit spark \
    --class=hbase.SparkHBaseMain  \
    --jars=target/filename.jar \
    --region=cluster-region \
    --cluster=cluster-name
--jars: Insert the name of your.jarfile after "target/" and before ".jar".- If you did not set the Spark driver and executor HBase classpaths when you
created your cluster,
you must set them with each job submission by including the
following
‑‑propertiesflag in you job submit command:--properties='spark.driver.extraClassPath=/etc/hbase/conf:/usr/lib/hbase/*,spark.executor.extraClassPath=/etc/hbase/conf:/usr/lib/hbase/*'
View HBase table output in the Cloud Shell session terminal output:
Waiting for job output...
...
+----+----+
| key|name|
+----+----+
|key1| foo|
|key2| bar|
+----+----+
Python
Submit the job.
gcloud dataproc jobs submit pyspark scripts/pyspark-hbase.py \
    --region=cluster-region \
    --cluster=cluster-name
- If you did not set the Spark driver and executor HBase classpaths when you
created your cluster,
you must set them with each job submission by including the
following
‑‑propertiesflag in you job submit command:--properties='spark.driver.extraClassPath=/etc/hbase/conf:/usr/lib/hbase/*,spark.executor.extraClassPath=/etc/hbase/conf:/usr/lib/hbase/*'
- If you did not set the Spark driver and executor HBase classpaths when you
created your cluster,
you must set them with each job submission by including the
following
View HBase table output in the Cloud Shell session terminal output:
Waiting for job output...
...
+----+----+
| key|name|
+----+----+
|key1| foo|
|key2| bar|
+----+----+
Scan the HBase table
You can scan the content of your HBase table by running the following commands in the master node SSH session terminal that you opened in Verify connector installation:
- Open the HBase shell:
hbase shell
- Scan 'my-table':
scan 'my_table'
ROW               COLUMN+CELL
 key1             column=cf:name, timestamp=1647364013561, value=foo
 key2             column=cf:name, timestamp=1647364012817, value=bar
2 row(s)
Took 0.5009 seconds
Clean up
After you finish the tutorial, you can clean up the resources that you created so that they stop using quota and incurring charges. The following sections describe how to delete or turn off these resources.
Delete the project
The easiest way to eliminate billing is to delete the project that you created for the tutorial.
To delete the project:
- In the Google Cloud console, go to the Manage resources page.
- In the project list, select the project that you want to delete, and then click Delete.
- In the dialog, type the project ID, and then click Shut down to delete the project.
Delete the cluster
- To delete your cluster:
gcloud dataproc clusters delete cluster-name \
    --region=${REGION}
