This page applies to Apigee and Apigee hybrid.
View
Apigee Edge documentation.
![]()
An environment is a runtime execution context for the API proxies and shared flows that you want to deploy. You must deploy your API proxies and shared flows to one or more environments before they can be accessed for testing. For more information about environments, see About environments and environment groups.
Configure and deploy environments as described in the following sections. See also Managing folders and files in an Apigee workspace.
Configuring an environment
Before you deploy an environment, configure it to identify the API proxies and shared flows you want to deploy, and configure shared flow hooks or target servers, as required.
To configure an environment, create the environment and edit the configuration defined in the following table.
| Configuration | Description |
|---|---|
Debug masks (debugmasks.json) |
Define mask configurations to mask specific data in trace and debug sessions. |
Deployments (deployments.json) |
Define the API proxies and shared flows in your deployment. |
Flow hooks (flowhooks.json) |
Attach shared flows to flow hooks so that they execute at the same place for all API proxies deployed to the environment. |
Target servers (targetservers.json) |
Decouple your concrete endpoints from your target endpoints to support load balancing and failover across multiple backend server instances. |
Key stores (keystores.json) |
Add TLS support to your target endpoints and target servers. |
In addition, if you use any policies that require resources, you can manage resources at the environment level, as required.
Creating an environment
To create an environment in Apigee in Cloud Code:
Perform one of the following actions:
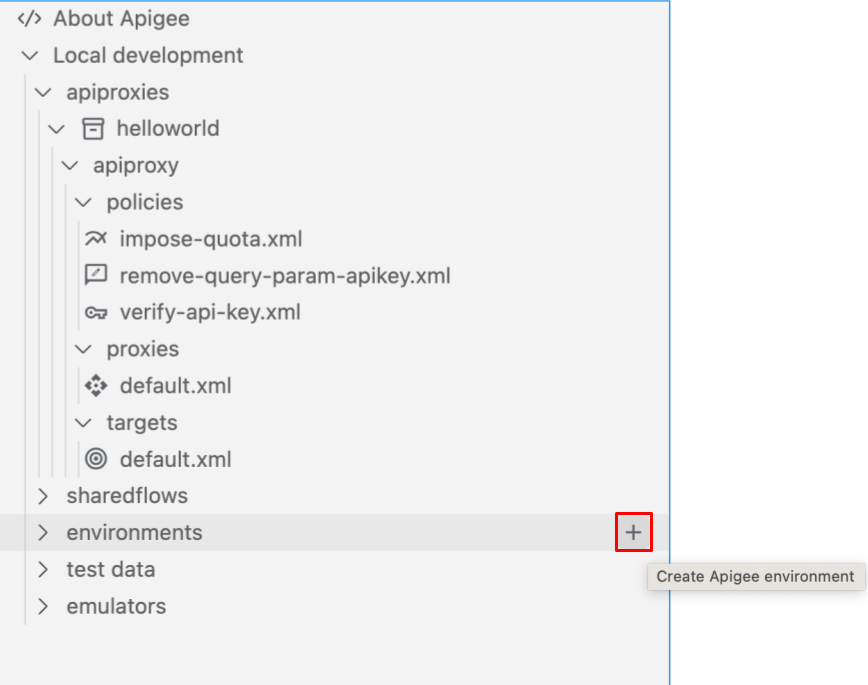
Position your cursor over the environments folder in your Apigee workspace and click
 .
.
Select View > Command Palette to open the Command palette and select Cloud Code: Create Apigee environment.
The Create environment wizard opens.
Enter a name for the environment and press Enter.
The environment is added to the environments folder in the Apigee section:
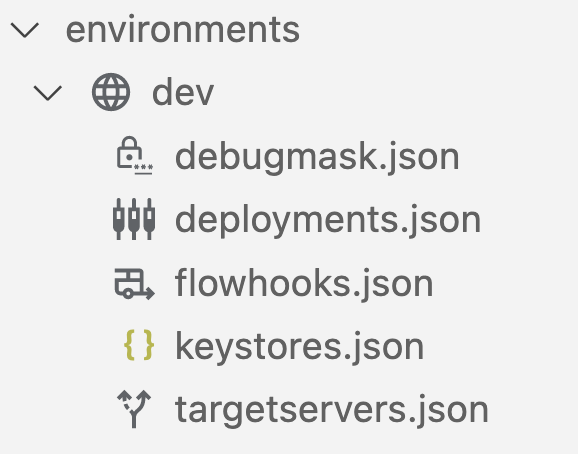
Configure the environment, as described in the following sections.
Configuring debug masks (debugmask.json)
Apigee lets you define mask configurations to mask specific data in trace and debug sessions. When data is masked, it is replaced with asterisks in the trace output. For example:
<description>**********</description>
For more information, see Masking sensitive data.
To configure debug masks, update the debugmask.json file by editing the file directly.
The following provides an example of the basic structure of a mask configuration in JSON format. For more information about the mask configuration fields shown in the example, see DebugMask.
{
  "namespaces": {
    "myco": "https://example.com"
  },
  "requestXPaths": [
    "/myco:Greeting/myco:User"
  ],
  "responseXPaths": [
    "/myco:Greeting/myco:User"
  ],
  "faultXPaths": [
    "/myco:Greeting/myco:User"
  ],
  "requestJSONPaths": [
    "$.store.book[].author"
  ],
  "responseJSONPaths": [
    "$.store.book[].author"
  ],
  "faultJSONPaths": [
    "$.store.book[*].author"
  ],
  "variables": [
    "request.header.user-agent",
    "request.formparam.password"
  ]
}
Configuring the deployments (deployments.json)
Configure the API proxies and shared flows that you want to include in the deployment.
To configure the deployments, update the deployments.json file using the configuration wizard or by editing the file directly.
To configure the deployments using the configuration wizard:
- Position your cursor over the deployments.json file for the environment and click
 .
.
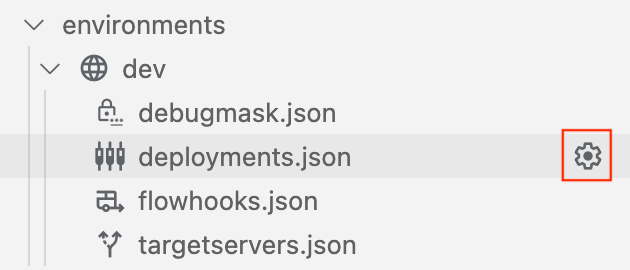
- Step through the configuration wizard to select the deployments and autopopulate fields in the
deployments.jsonfile. Thedeployments.jsonfile is opened in the editor. - Edit the configuration, as required.
- Select File > Save or ⌘S to save your edits.
The following example configures the deployment to include the helloworld API proxy and mysharedflow and hw-sharedflow shared flows:
{
  "proxies" : [
     "helloworld"
  ],
  "sharedflows" : [
     "mysharedflow",
     "hw-sharedflow"
  ]
}
Configuring service accounts with proxy and shared flow deployments
API proxies that depend on a Google service as a backend may require a Google Cloud service account to be associated with the deployment. See Using Google authentication.
When editing the deployments.json file, you can associate the API proxy or shared flow with a Google Cloud service account. For example:
{
  "name": "proxy-name",
  "serviceAccount": "associated-service-account"
}
The following example shows a deployment configuration where service accounts are associated with the API proxy helloworld and shared flow mysharedflow, however the proxy healthcheck and shared flow hw-sharedflow are not associated with a service account:
{
  "proxies": [
    {
      "name": "helloworld",
      "serviceAccount": "myserviceaccount@myorg.iam.gserviceaccount.com"
    },
    "healthcheck"
  ],
  "sharedflows": [
    {
      "name": "mysharedflow",
      "serviceAccount": "myserviceaccount@myorg.iam.gserviceaccount.com"
    },
    "hw-sharedflow"
  ]
}
Learn more about how to configure the Apigee Emulator to test service account authentication features in your API proxy.
Attaching shared flows using flow hooks (flowhooks.json)
With a flow hook, you attach a shared flow so that it executes at the same place for all API proxies deployed to a specific environment. This gives you a separately implemented and deployed sequence of logic that is not part of an API proxy's implementation code. Specifically, you can attach a shared flow at the following locations in the API proxy flow:
- Before an API proxy endpoint executes (
PreProxyFlowHook) - After the API proxy endpoint executes and right before the response is sent out to the client (
PostProxyFlowHook) - Before a target endpoint executes (
PreTargetFlowHook) - After the target response executes (
PostTargetFlowHook)
For more information about flow hooks, see Attaching shared flows using flow hooks.
To attach shared flows using flow hooks, update the flowhooks.json file using the configuration wizard or by editing the file directly.
To configure the flow hooks using the configuration wizard:
- Position your cursor over the flowhooks.json file for the environment and click
 .
. - Select the shared flow(s) to attach at specific locations in the API proxy flow and autopopulate fields in the
flowhooks.jsonfile. Theflowhooks.jsonfile is opened in the editor. - Edit the configuration, as required.
- Select File > Save or ⌘S to save your edits.
The following example attaches the mysharedflow to the PreProxyFlowHook so that it executes before an API proxy endpoint executes:
{
  "PreProxyFlowHook": {
    "continueOnError": true,
    "sharedFlow": "mysharedflow",
    "description": "Shared enforced before a proxy endpoint executes."
  }
}
Configuring the target servers (targetservers.json)
Target servers (TargetServers) decouple concrete endpoint URLs from target endpoint (TargetEndpoint) configurations. Instead of defining a concrete URL in the configuration, you can configure one or more named TargetServers. Then, reference each TargetServer by name in a TargetEndpoint HTTPConnection.
For more information about target servers, refer to the following topics:
- Load balancing across backend servers
- Antipattern: Load balance with a single target server with MaxFailures set to a no-zero value
To configure target servers, update the targetservers.json file using the configuration wizard or by editing the file directly.
For a description of the fields in the targetservers.json file, see Resource: TargetServer.
To configure the target servers using the configuration wizard:
- Position your cursor over the targetservers.json file for the environment and click
 .
. - Step through the configuration wizard to configure the target server and autopopulate fields in the
targetservers.jsonfile. Thetargetservers.jsonfile is opened in the editor. - Edit the configuration, as required.
- Select File > Save or ⌘S to save your edits.
The following example adds a new target server in the environment:
[
  {
    "enabled": true,
    "name": "mytargetserver",
    "description": "My first target server",
    "host": "localhost",
    "port": 80
  }
]
The following example configures a target server with mutual TLS using keystores:
[
    {
        "name": "mtlsserver",
        "host": "mytargetserver.mydomain",
        "port": 443,
        "enabled": true,
        "protocol": "HTTP",
        "tlsInfo": {
            "enabled": true,
            "clientAuthEnabled": true,
            "keyStore": "mykeystore",
            "keyAlias": "mykeyandcert",
            "trustStore": "mytruststore"
        }
    }
]
Configuring the keystores (keystores.json)
Keystores define repositories of security certificates used for TLS encryption in target endpoints and target servers.
For more information about TLS configuration, see Options for configuring TLS.
To configure keystores:
- Open the
keystores.jsonfile for the environment in the editor. The file has two main elementsstores- A map of added keystore name and the aliases.references- A map of all the keystore reference names and the associated keystore name.
- Edit the configuration, as required.
- Select File > Save or ⌘S to save your edits.
The following example shows a keystore mykeystore with two aliases, mycert-alias and mykeycert-alias:
{
    "stores": {
      "mykeystore": {
        "my-cert-alias": {
          "cert": "/Users/jdoe/testkeys/cert1.pem"
        },
        "my-keycert-alias": {
          "key": "/Users/jdoe/testkeys/key1.pem",
          "cert": "/Users/jdoe/testkeys/cert1.pem"
        }
      }
    }
  }
Deploying an environment
Deploy your API proxies and shared flows configured for an environment so they can be accessed for testing.
To deploy an environment:
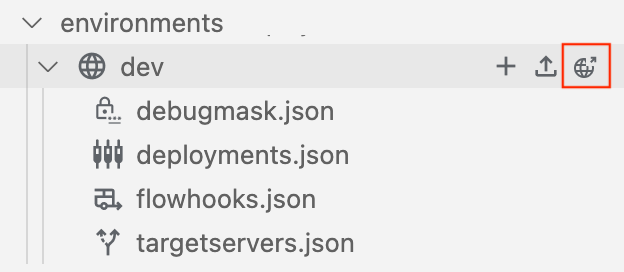
- In the Apigee section, position your cursor over the folder of the environment that you want to deploy.
- Click
 .
.
- If multiple containers for the Apigee Emulator are running, select the container to which you want to deploy the environment.
- Select the test bundle that you want to export with the deployment or select Deploy without a test bundle.

You can export test resources later, as described in Exporting test resources to the Apigee Emulator.
The environment deploys and shows a success message in the Output tab.
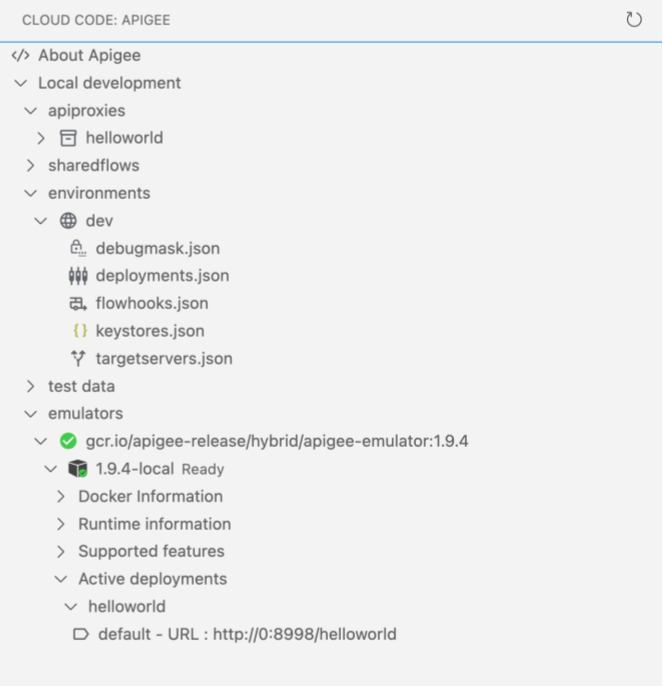
The deployed applications are displayed in the Apigee Emulator:
