This page applies to Apigee and Apigee hybrid.
View
Apigee Edge documentation.
![]()
Follow the instructions on this page to use Cloud Code to design and edit APIs.
Additional roles needed for designing APIs
You'll need the roles listed below to perform some API design and testing steps described on this page.
| Task | Required Role(s) |
|---|---|
| Design APIs using Gemini Code Assist | Gemini for Google Cloud User Service Usage Consumer See Grant IAM roles in a Google Cloud project for Gemini Code Assist. |
| Use enterprise context from your existing APIs in API hub when designing APIs | Cloud API Hub Viewer |
| Register your new APIs to API hub | Cloud API Hub Editor or Admin |
| Edit API hub APIs in Cloud Code | Cloud API Hub Editor or Admin |
| Set up and manage a remote mock server to test APIs | Artifact Registry Administrator Cloud Build Service Account Cloud Run Admin Service Usage Admin See IAM basic and predefined roles reference. |
Design APIs with Gemini Code Assist
You can use Cloud Code to design OpenAPI specification (OAS), version 3.0 APIs using Gemini Code Assist. Gemini Code Assist can include enterprise context for generative AI assistance in the API development process. Enterprise context uses the project's API hub APIs for context when generating new APIs and is available only with projects using API hub.
See Use Gemini Code Assist for information on setup steps to using the functionality in this section.
Generate an API
To generate an API, follow these steps:
- Click the magic wand in the left nav to use Gemini Code Assist to create a new API spec. Make
sure to use this method to create API specs instead of Gemini Code Assist chat, which
does not support all features and functionality when creating API specs.
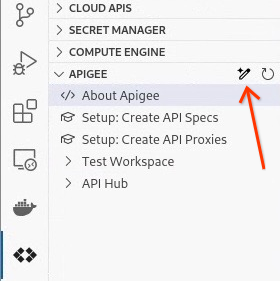
- Enter a prompt describing the new API in the Create an API spec input window.
- If desired, select a prompt template from the template chips shown. A prompt template provides a framework for your prompt to help you get started.
- Enter a prompt. See How to write effective API spec prompts.
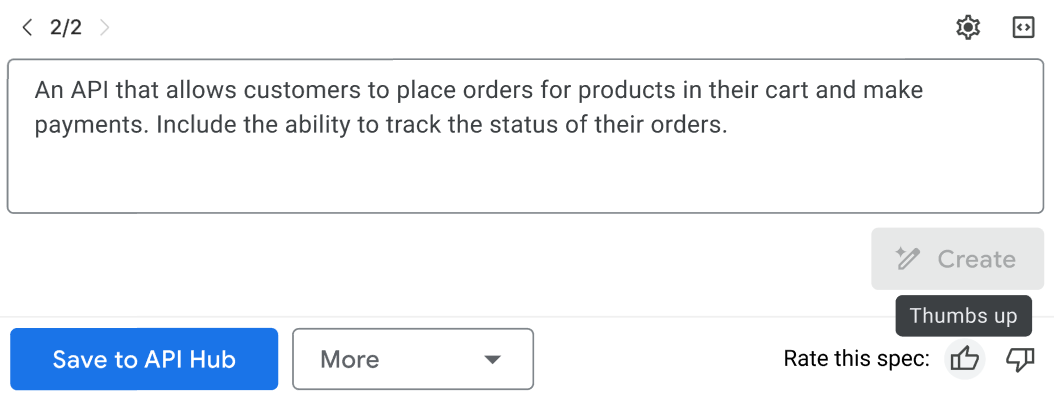
- Gemini Code Assist generates an OAS defining the API.
- Review the spec:
- Click View code to review the spec in the code editor.
- The API renderer panel previews the API as it can be viewed by developers, including the API description and other documentation.
- If you already have APIs on API hub, that enterprise context is used to
reuse objects from other APIs to this OAS and is enumerated in the
OUTPUTpanel:
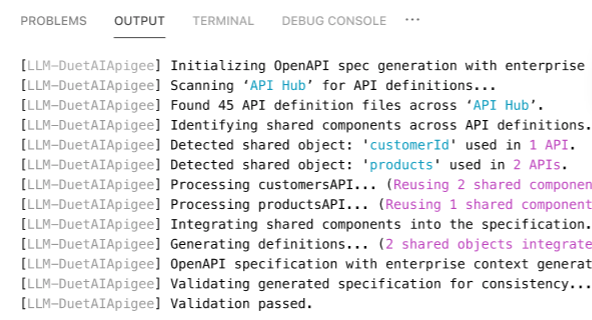
- We appreciate your feedback! Provide feedback on the generated spec by clicking the
thumbs-up or thumbs-down icon in the Swagger panel.

- If you'd like to edit preview prompts and regenerate the spec, click the prompt history arrows
above the prompts to move between previous prompts.

- Test the spec. Once the new spec is complete, you can test it using a mock server. See Test your API using a mock server.
- Click Save to save your new API with a name of your choice.
- To create an Apigee API proxy from this spec, click
Create API proxy from the More menu. The creation process creates a
proxy bundle.
You should see the new proxy in the left menu list of your proxies. See the API proxy
creation walkthrough that's integrated within Cloud Code for additional information on
creating proxies from Cloud Code.

How to write effective API spec prompts
The accuracy and suitability of a generated API spec depends largely on the prompt that was provided to the model.
These are examples of good prompts:
- Create an API that allows customers to pay for an order using various payment methods such as credit cards and debit cards.
- Accept purchase orders for specialized coffee bean purchases through an API.
- We are a pizza company and want to create an online customized pizza delivery solution. Create an api to accept the pizza orders.
- API for food delivery business. Customers can order a combination of pizza, burgers, or sandwiches in a single order. Each of those food types have its own schema. Pizzas have toppings and size. Burgers have toppings and patty type. Sandwiches have bread type, meat type, veggies, cheese, and custom instructions.
These example show less effective prompts. Try to avoid prompts structured like these:
- Create an API for my store. This prompt contains too little information for the model to generate a complete and accurate spec.
- Create a new refund API that reuses the order object. You do not need to specify which objects Gemini Code Assist should reuse when creating new APIs; Gemini Code Assist automatically detects the best-suited objects to reuse.
Register the API with API hub
Once your API is reviewed and final, you can make it available to developers by registering it with API hub:
- Click Register to API hub.
- Follow the prompts to register the API. See Register APIs for information on registering with API hub and the information you need to provide.
Update your API hub APIs from Cloud Code
You can save a new version of your API hub specs when editing them from Cloud Code.
To save the spec as a new version, click the More options... button in the Swagger panel and Publish to API hub. Provide the new API version ID. You should see the new version appear in the version list for that API in the API hub list in Cloud Code.
Use the settings file to control Gemini Code Assist behaviors
This section explains how to manage whether and how Gemini Code Assist is available, from the settings file.
Disable or enable Gemini Code Assist
Once you've set up Apigee in Cloud Code (see Setting up Apigee in Cloud Code), you can add this line to your settings file to temporarily disable all Gemini Code Assist features:
"cloudcode.apigee.gemini.enable": false
Remove the line or set it to true (the default) to re-enable
Gemini Code Assist.
Control enterprise context in spec generation
OAS generation can include schema, metadata, and security definitions from your organization's other APIs. The process finds similar APIs using the object names and descriptions in your API hub catalog that are in your API hub catalog that you are authorized to access. The deployment status of the API hub APIs is not considered.
Enterprise context is enabled by default.
You can:
- See the number of modifications included from enterprise context, if any, in the
Swagger panel:

- See the included modifications in the Output panel:

To disable enterprise context for new spec generation, add these lines in the
settings.json file after
"cloudcode.apigee.gemini.enable": true:
"cloudcode.apigee.gemini.options": {
        "enterpriseContext": {
          "enabled": false,
          "includeMetadata": false,
          "includeSchema": false,
          "includeSecurity": false
        }
}enabledspecifies whether enterprise context is enabled overall. Set tofalseto disable enterprise context.includeMetadatacontrols whether metadata context is included. This setting includes or excludes metadata from other APIs in API hub.includeMetadatais only applicable whenenabledis set totrue.includeSchemacontrols whether schema context is included. This setting includes or excludes schema information from other APIs in API hub.includeSchemais only applicable whenenabledis set totrue.includeSecuritycontrols whether security-related context is included. This setting includes or excludes security information from other APIs in API hub.includeSecurityis only applicable whenenabledis set totrue.
Edit APIs
To use Cloud Code to edit existing APIs that are part of your API hub catalog, follow these instructions. Changes you make in Cloud Code can be saved back to API hub.
These instructions are for users who are not using the Gemini Code Assist add-on for Apigee. For information on additional functionality that is available with Gemini Code Assist when designing and editing APIs, see Design an API with Gemini Code Assist.
To edit an API spec:
- Make sure that the project you've selected in Cloud Code is the project with the API hub catalog containing the API you want to edit.
- In the left nav, expand the API Hub tree.
- Select the API and version to edit from the list.
- Edit the spec in the editing panel. You can also view the API operations in the Swagger panel.
- Optionally, test your API using a mock server.
- Save the changes as a new version with the More button in the Swagger panel and then Publish to API hub. Confirm or update the version when prompted and save the changes back to API hub. You should see the new version appear in the version list for that API in the API hub list in Cloud Code.
Test your API using a mock server
You can test your API using either a local mock server or a Google Cloud-based remote mock server. The local mock server is installed and available by default while you must set up and manage Google Cloud mock servers.
Use the local mock server
The local mock server accepts requests to this API and emulates responses. It is usable only during the current session by the current user. However, unlike the remote mock server, it requires no setup or management and incurs no costs.
To use the local mock server:
- Select the local mock server (development server) in the Servers dropdown.
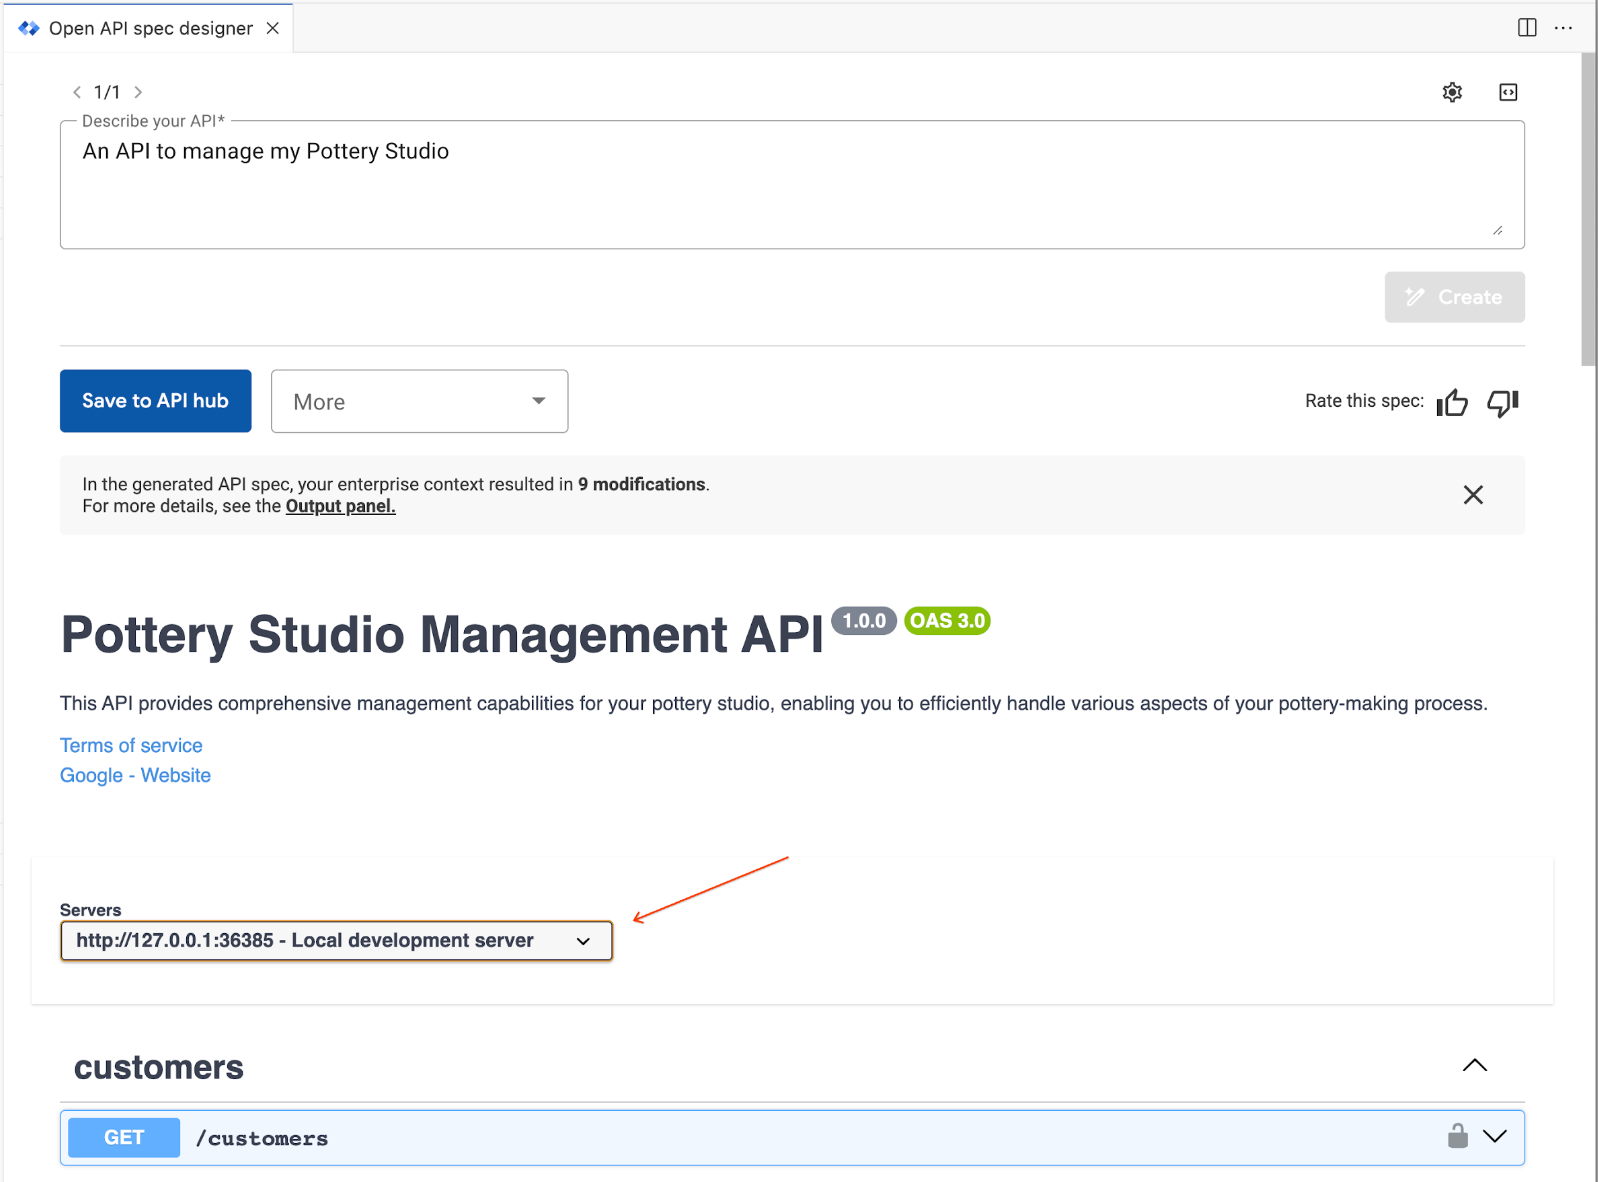
- Open a path and click Try it out.
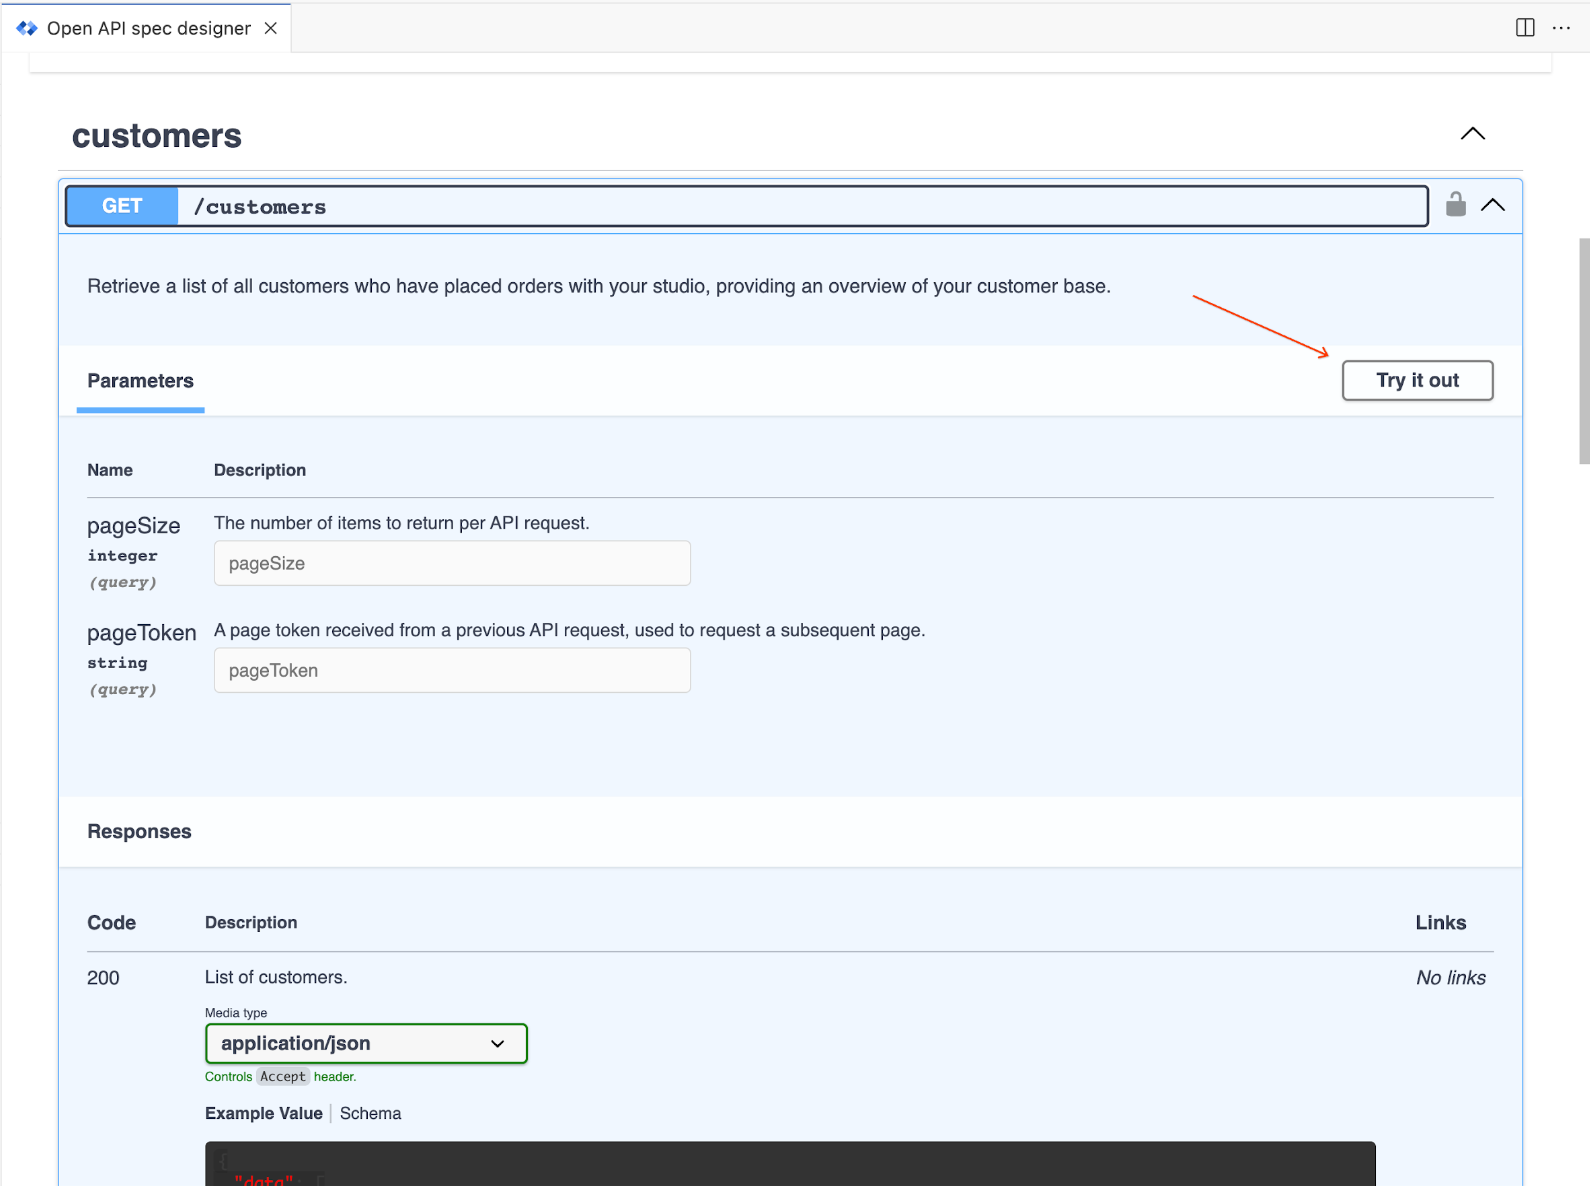
- Fill out any request parameters and click Execute.
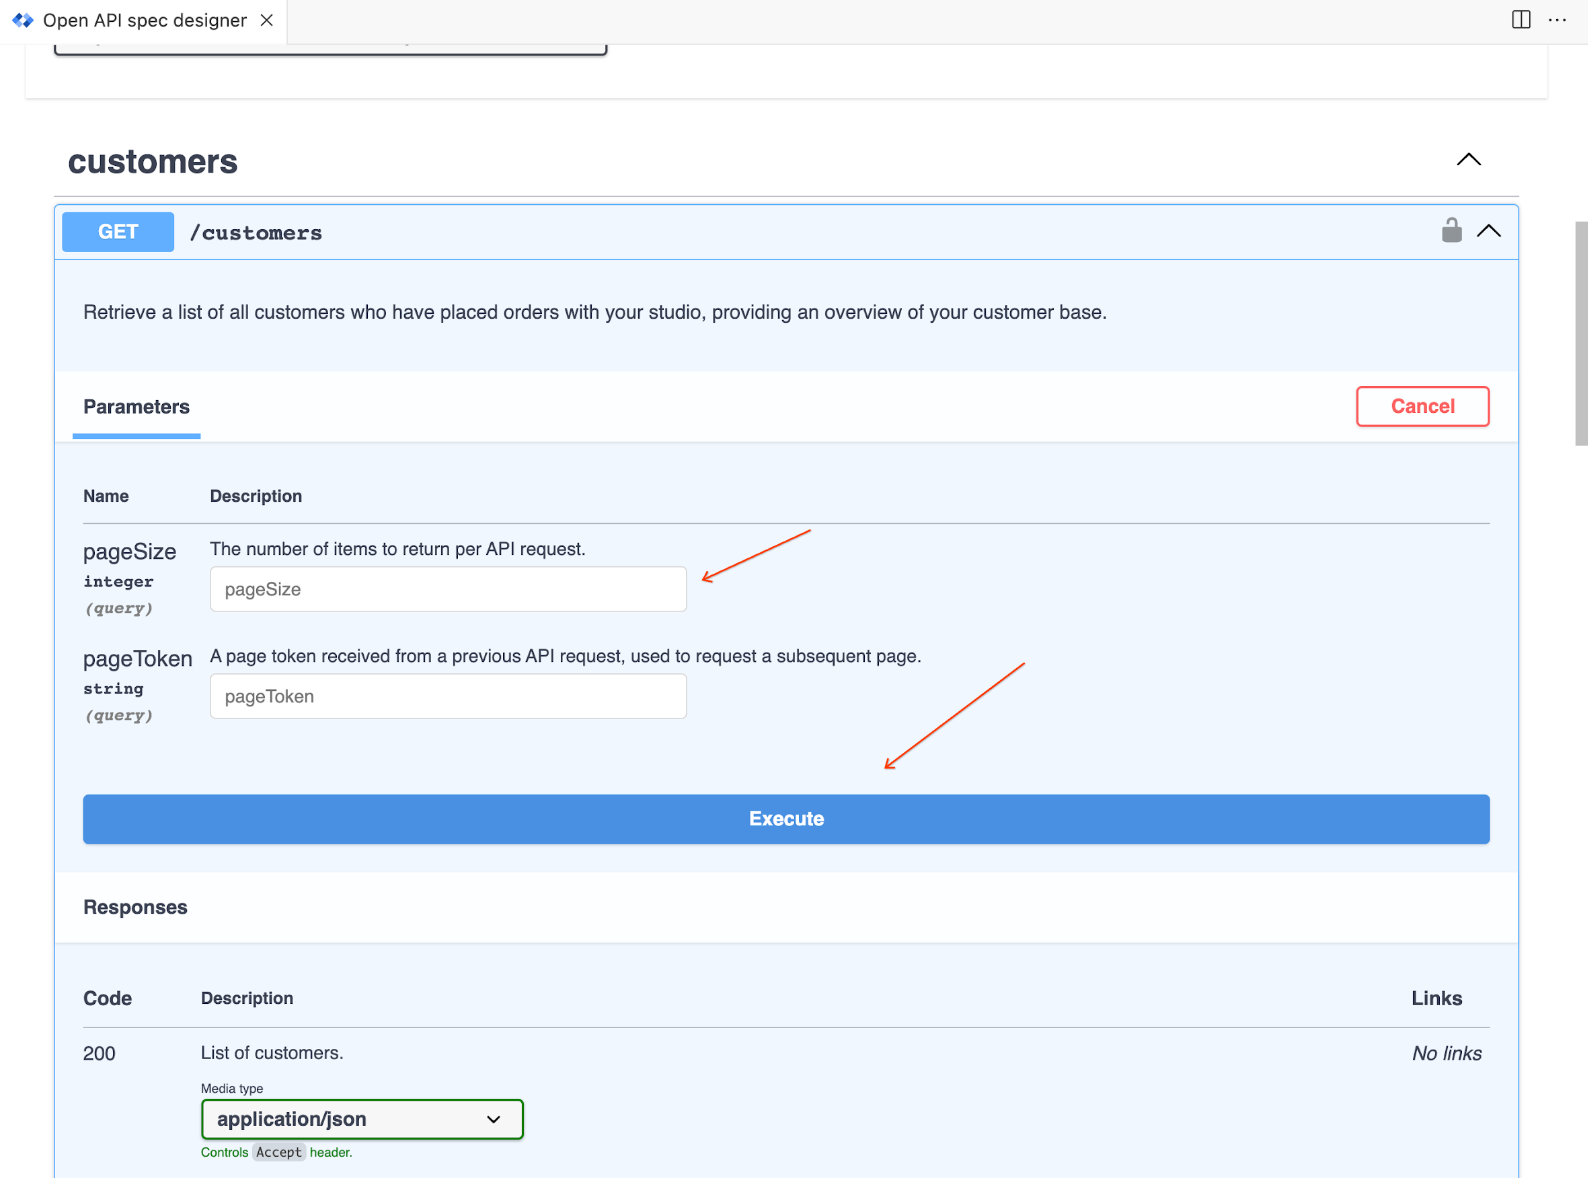
- You can also submit requests using
curlfrom a prompt. Use the server address and port from the Servers dropdown.
Use a remote mock server
A remote mock server provides you with the ability to create a persistent mock server instance that, unlike the local mock server, can be shared with and used by others within your organization to test the new API before it is in production. Remote mock servers can only be used with APIs that are registered in API hub.
At this time remote mock servers can be created in Google Cloud. Google Cloud remote mock servers do not automatically update for any changes you make to the API after deploying the mock server, so wait to add the mock server until you have fully created the API.
Deploying a Google Cloud remote mock server creates a new Cloud Run service. It builds a container image for the mock server using Cloud Build and uploads the container image to Cloud Artifact Registry in your Google project; you are responsible for any resulting costs and maintenance on those after creation. You are also responsible for deleting them once they are no longer needed. See What is Cloud Run?, Managing Services, and the Artifact Registry documentation.
To deploy a remote mock server:
- Select Deploy mock server (Google Cloud) from the More menu.
- If your API is not already registered in API hub, register it when prompted.
- Specify details for the remote mock server: Project ID, Server Name, and Region and click Create to create the remote mock server.
- The remote mock server generation requires several minutes. You can watch the progress in the Google Cloud OUTPUT panel.
- Once the remote mock server creation is complete, you'll see the remote server URL in the Swagger panel server list and the OUTPUT panel.
- To use the mock server, open a path and click Try it out.

Fill out any request parameters and click Execute.

You can also submit requests usingcurlfrom a prompt. Use the server address and port from the Servers dropdown.
To share access to the mock server with other users:
- Give other users the invoker role for the deployed service. See Authenticate developers.
- When making the request to the mock server, users follow the instructions in Test your private service.
Use these steps to manage deployed remote mock servers:
- Go to API hub and find the API to see all the deployments for the API, which includes any remote mock servers.
- Use the Resource URL to go the deployment and manage it by stopping, deleting, and performing other actions on the mock server.
