A service account is a special type of account in Google Cloud that enables components and applications of a system to interact with each other and with other APIs. For more information about Google Cloud, see About Google Cloud services.
Hybrid uses Google Cloud service accounts to perform a variety of tasks, including:
- Send log and metrics data
- Pull trace requests
- Connect to API gateway for administrative API requests
- Execute back ups
- Download proxy bundles
While one service account could perform all of these operations, Apigee recommends that you create multiple service accounts, each assigned to a specific task and each with its own set of permissions. This enhances security by compartmentalizing access and limiting each service account’s scope and access privileges. As with user accounts, these permissions are applied by assigning one or more roles to the service account.
Service accounts and roles used by hybrid components
To operate properly, Apigee hybrid requires you to create several service accounts. Each service account requires a specific role or roles that enable it to perform its function.
The following table describes the service accounts for the hybrid components:
| Component* | Role | Required for basic install? | Description |
|---|---|---|---|
apigee-cassandra |
Storage Object Admin | Allows Cassandra backups to Cloud Storage, as described in Backup and recovery. | |
apigee-logger |
Logs Writer | Allows logging data collection, as described in Logging. Only required for non-GKE cluster installations. | |
apigee-mart |
Apigee Connect Agent | Allows MART service authentication. The Apigee Connect Agent role alows it to communicate securely with the Apigee Connect process, as described in Using Apigee Connect. | |
apigee-metrics |
Monitoring Metric Writer | Allows metrics data collection, as described in Metrics collection overview. | |
apigee-org-admin |
Apigee Organization Admin | Lets you call the getSyncAuthorization API and
setSyncAuthorization API. You cannot create this service account with the
create-service-account tool. |
|
apigee-synchronizer |
Apigee Synchronizer Manager | Allows the synchronizer to download proxy bundles and environment configuration data. Also enables operation of the trace feature. | |
apigee-udca |
Apigee Analytics Agent | Allows the transfer of trace, analytics and deployment status data to the management plane. | |
apigee-watcher |
Apigee Runtime Agent | Apigee Watcher pulls virtual hosts related changes for an org from synchronizer and makes necessary changes to configure istio ingress. | |
| * This name is used in the downloaded service account key's filename. | |||
In addition to creating the service accounts listed in this table, you also download their private keys. You later use these keys to generate access tokens so that you can access the Apigee APIs.
Create the service accounts
There are several ways to create service accounts, including:
- (Recommended)
create-service-accounttool - Google Cloud console
- gcloud SDK
Each of these is described in the following sections.
Use the service account creation tool
The create-service-account tool (available after you
download and expand apigeectl) creates
hybrid component-specific service accounts and assigns the required roles for you. The
tool also automatically downloads the service account keys and stores them on your local machine in
the specified directory.
To create service accounts with the create-service-account tool:
- Download and expand
apigeectl(if you haven't done so already), as described in download and install apigeectl. - Create a directory to store your service account keys. For example:
mkdir ./service-accounts
- Execute the following commands:
./tools/create-service-account apigee-metrics ./service-accounts
./tools/create-service-account apigee-synchronizer ./service-accounts./tools/create-service-account apigee-udca ./service-accounts./tools/create-service-account apigee-mart ./service-accounts./tools/create-service-account apigee-cassandra ./service-accounts./tools/create-service-account apigee-logger ./service-accountsThese commands create most of the required accounts and stores their keys in the
./service-accountsdirectory. These commands do not create theapigee-org-adminservice account.If these commands fail, make sure you referenced an existing directory in which to store the key files.
For more information on using
create-service-account, see create-service-account reference. - Create the
apigee-org-adminservice account. To do this, use the Google Cloud console.
Use the Google Cloud console
You can create service accounts with the Google Cloud console.
To create service accounts with the Google Cloud console:
- Open the Google Cloud console and log in with the user account you created in Step 1: Create a Google Cloud account.
- Select the project that you created in Step 2: Create a Google Cloud project.
- Select IAM & admin > Service accounts.
The console displays the Service accounts view. This view displays a list of the project’s service accounts. (In most cases, there will be no accounts listed yet, although there might be default service accounts in the list, depending on how you created your project.)
- To create a new service account, click +Create Service Account at the top of
the view.
The Service account details view displays.
- In the Service account name field, enter the name of the service account.
Apigee recommends that you use a name that reflects the service account's role; you can set the name of the service acount to be the same name as the component that uses it. For example, set the name of the Logs Writer service account
apigee-logger.For more information about the service accounts names and roles, see Service accounts and roles used by hybrid components.
As you enter a name, Google Cloud generates a unique service account ID for you, which is structured like an email address, as the following example shows:
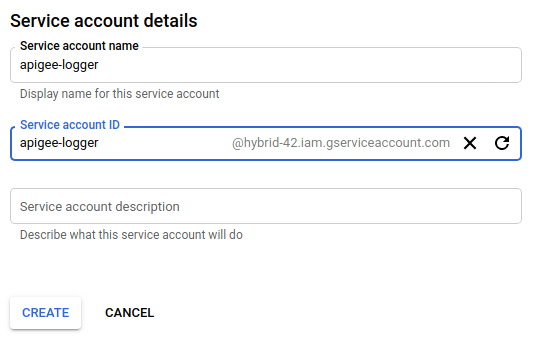
You can optionally add a description in the Service account description field. Descriptions are helpful at reminding you what a particular service account is used for.
- Click Create.
Google Cloud creates a new service account and displays the Service account permissions view, as the following example shows:
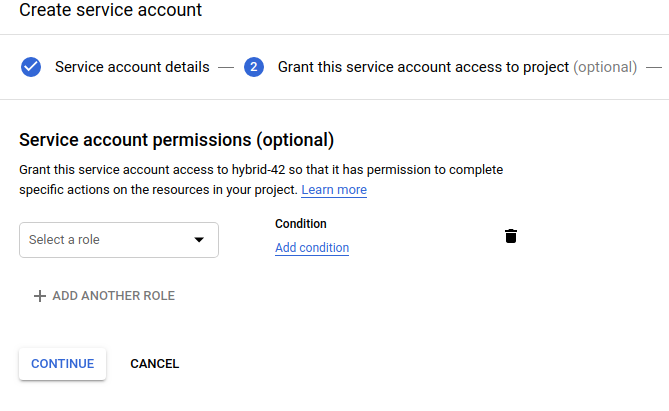
Use this view to assign a role to your new service account.
- Click the Select a role drop-down list.
- Select the role for the service account, as described in
Service accounts and roles used by hybrid components. If the
Apigee roles do not appear in the drop down list, refresh the page.
For example, for the logging component, select the Logs Writer role.
If necessary, enter text to filter the list of roles by name. For example, to list only the Apigee roles, enter “Apigee” in the filter field, as the following example shows:
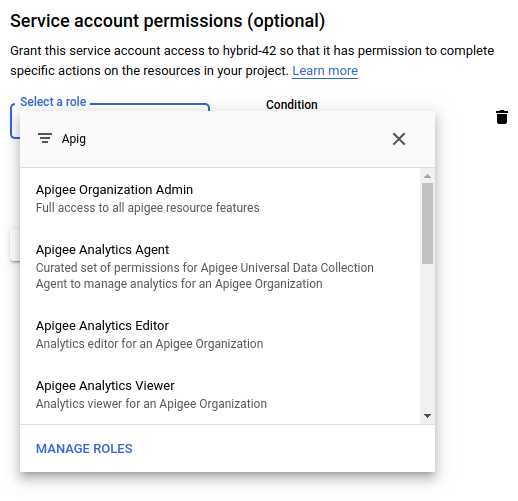
You can add more than one role to a service account, but Apigee recommends that you only use one role for each of the recommended service accounts. To change the roles of a service account after you have created it, use the IAM & admin panel in the Google Cloud.
- Click Continue.
Google Cloud displays the Grant users access to this service account view:
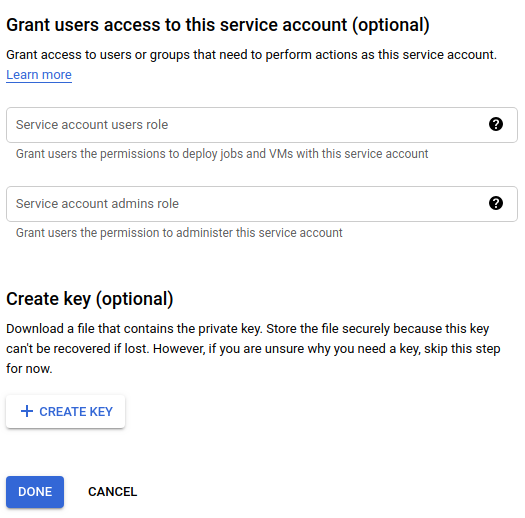
- Under Create key (optional), click Create Key.
Google Cloud gives you the option to download a JSON or P12 key:
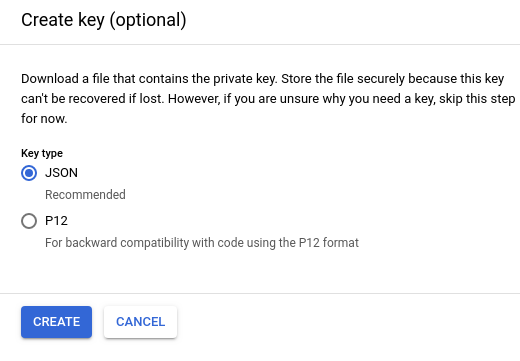
- Select JSON (the default) and click Create.
Google Cloud saves the key file in JSON format to your local machine and displays a confirmation when it is successful, as the following example shows:

You will later use some of the service account keys to configure hybrid runtime services. For example, when you configure the hybrid runtime, you will specify the location of the service account keys using the service_name
.serviceAccountPathproperties.These keys are used by the service accounts to get access tokens, which the service account then uses to make requests against the Apigee APIs on your behalf. (But that’s not for a while yet; for now, just remember where you saved it.)
- Repeat steps 4 through 11 for each service account listed in
Service accounts and roles used by hybrid components
(except the
apigee-martaccount—which has no role associated with it—so do not assign it a role).When you're finished, you should have the following service accounts (in addition to the defaults, if any):
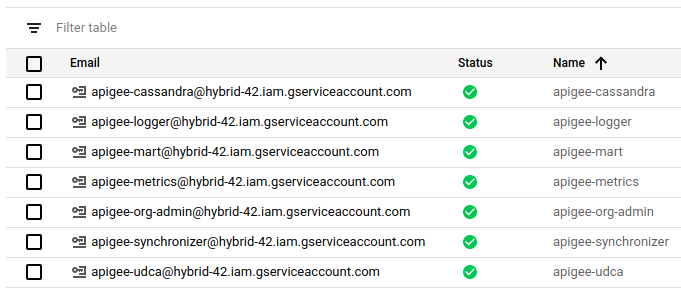
In the Google Cloud console, service accounts are indicated with a
 icon.
icon.
After you create a service account, if you want to add or remove a role to it, you must use the IAM & Admin view. You cannot manage roles for service accounts in the Service accounts view.
Use the gcloud service account creation APIs
You can create and manage service accounts with the Cloud Identity and Access Management API.
For more information, see Creating and managing service accounts.
