This page applies to Apigee and Apigee hybrid.
View
Apigee Edge documentation.
![]()
Authorization code is one of the most commonly used OAuth 2.0 grant types. The authorization code flow is a three-legged OAuth configuration. In this configuration, the user authenticates himself with the resource server and gives the app consent to access their protected resources without divulging username/passwords to the client app.
About this topic
This topic offers a general description and overview of the OAuth 2.0 authorization grant type flow and discusses how to implement this flow on Apigee.
Video
Watch a short video to learn how to use the OAuth 2.0 authorization grant type to secure your APIs.
Use cases
This grant type is intended for apps that are written by third-party developers who do not have a trusted business relationship with the API provider. For example, developers who register for public API programs should not generally be trusted. With this grant type, the user's credentials on the resource server are never shared with the app.
Code sample
You can find a complete, working sample implementation of the authorization code grant type on
Apigee in the api-platform-samples repo on GitHub. See the oauth-advanced
sample in the api-platform-samples/sample-proxies directory. See the
README file for details on the sample.
Flow diagram
The following flow diagram illustrates the authorization code OAuth flow with Apigee serving as the authorization server.
.png)
Steps in the authorization code flow
Here is a summary of the steps required to implement the authorization code grant type where Apigee serves as the authorization server. Remember, the key to this flow is that the client never gets to see the user's credentials on the resource server.
Prerequisite: The client app must be registered with Apigee to obtain the client ID and client secret keys. See Registering client apps for details.
1. User initiates the flow
When the app needs to access the user's protected resources from a resource server (for example, contacts list on a social media site), it sends an API call to Apigee, which validates the client's ID and, if it's valid, redirects the user's browser to a login page where the user will enter their credentials. The API call includes information the client app obtained when it was registered: the client ID and redirect URI.
2. User enters credentials
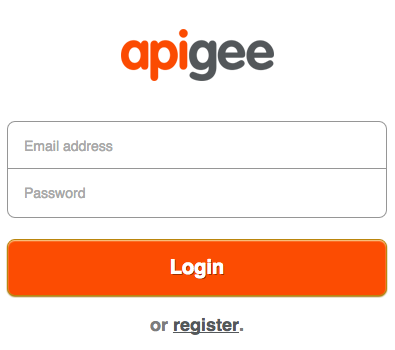
The user now sees a login page where they are asked to enter their login credentials. If the login is successful, we go to the next step.

3. User gives consent
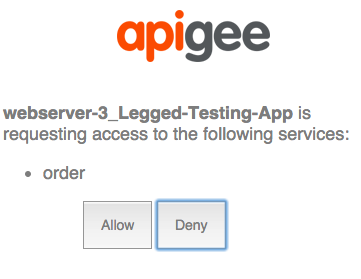
In this step, the user gives the app consent to access their resources. The consent form typically includes scope selections, where the user can choose what the app is permitted to do on the resource server. For example, the user may give read-only permission, or permission for the app to update resources.

4. The login app sends a request Apigee
If the login and consent are successful, the login app POSTs data to the /authorizationcode endpoint of Apigee. The data includes the redirect URI, client ID, scope, any user-specific information it wishes to include, and an indication that the login was successful.
5. Apigee generates an authorization code
When Apigee receives a GET request from the login app on its /authorizationcode endpoint, two things happen. First, Apigee determines that the login was successful (by checking HTTP status or some other means). Next Apigee checks to be sure that the redirect URI sent from the login app matches the redirect URI that was specified when the app was registered with Apigee. If everything is okay, Apigee generates an authorization code. For example:
http://myorg-test.apigee.net/oauth/authorizationcode?client_id={consumer_key}&response_type=code&redirect_uri={redirect_uri}&scope=scope1%20scope2&state={some_string}
6. Apigee sends the authorization code back to the client
Apigee sends a 302 redirect with the auth code attached as a query parameter to the client.
7. The client retrieves the authorization code and requests an access code from Apigee
Now with a valid auth code, the client can request an access token from Apigee. It does this by POSTing the client ID and client secret keys (obtained when the app was registered on Apigee), the grant type, and scope. By including the client ID and secret keys Apigee can verify that the client app is the one that was registered. For example:
$ curl https://{org_name}-test.apigee.net/my_oauth_proxy/accesstoken?code=Xyz123&grant_type=authorization_code -X POST -d 'client_id=bBGAQrXgivA9lKu7NMPyoYpKNhGar6K&client_secret=hAr4GngA9vAyvI4'
8. The client receives an access token
If everything is successful, Apigee returns an access token to the client. The access token will have an expiration, and it will be valid only for the scope specified by the user when they gave consent to the app to access their resources.
9. The client calls the protected API
Now, with a valid access code, the client can make calls to the protected API. In this scenario, requests are made to Apigee (the proxy), and Apigee is responsible for validating the access token before passing the API call along to the target resource server. Access tokens are passed in an Authorization header. For example:
$ curl -H "Authorization: Bearer ylSkZIjbdWybfs4fUQe9BqP0LH5Z" http://{org_name}-test.apigee.net/weather/forecastrss?w=12797282
Configuring flows and policies
As the authorization server, Apigee needs to process a number of OAuth requests: for access tokens, auth codes, refresh tokens, login page redirects, etc. There are two fundamental steps to configure these endpoints:
- Creating custom flows
- Adding and configuring OAuthV2 policies
Custom flow configuration
You typically configure this grant type flow so that each step or leg of the flow is defined
by a flow in the Apigee proxy. Each flow has an endpoint and a policy that performs the
OAuth-specific task required, such as generating an authorization code or an access token. For
example, as shown in the XML below, the /oauth/authorizationcode endpoint has an
associated policy called GenerateAuthCode (which is an OAuthV2 policy with the
GenerateAuthorizationCode operation specified).
The easiest way to show the flow configuration is with an XML example. See the in-line comments for information about each flow. This is an example -- names of flows and paths can be configured however you wish. See also Configuring OAuth endpoints and policies for a quick overview of the steps needed to create a custom flow like this.
See also the example implementation on GitHub.
<Flows>
  <Flow name="RedirectToLoginApp">
         <!--
         Publish this URI to developers to use for their 'login' link
         -->
    <Condition>proxy.pathsuffix == "/oauth/authorize"</Condition>
    <Request>
        <Step><Name>RedirectToLoginPage</Name></Step>
    </Request>
  </Flow>
  <Flow name="GetAuthCode">
         <!--
         Call this URL from your Login app after you authenticate the user.
         The policy will automatically return the auth code in the response to the
         redirect_uri registered by the calling app
         -->
    <Condition>proxy.pathsuffix == "/oauth/authorizationcode"</Condition>
    <Request>
        <Step><Name>GenerateAuthCode</Name></Step>
    </Request>
  </Flow>
  <Flow name="GetAccessToken">
         <!-- This policy flow is triggered when the URI path suffix
         matches /oauth/accesstoken. Publish this URL to app developers
         to use when obtaining an access token using an auth code
         -->
    <Condition>proxy.pathsuffix == "/oauth/accesstoken"</Condition>
    <Request>
        <Step><Name>GenerateAccessToken</Name></Step>
    </Request>
  </Flow>
</Flows>
Configure the flows with policies
Each endpoint has a policy associated with it. Let's see examples of the policies. See also Configuring OAuth endpoints and policies for a quick overview of the steps needed to add OAuthV2 policies to proxy endpoints.
Login redirect
This is the /oauth/authorize path. The attached policy is responsible for
redirecting the user to a login app, where the end user can safely authenticate and authorize the
client app to access their protected resources without divulging their username and password to
the client app. You can accomplish this with a service callout policy, JavaScript, or
other means.
The API call to do the request is a GET and requires the query parameters client_id, response_type, redirect_uri, scope, and state.
$ curl http://myorg-test.apigee.net/oauth/authorize?client_id={consumer_key}&response_type=code&redirect_uri={redirect_uri}&scope=scope1%20scope2&state={some_string}
Get auth code
This is the /oauth/authorizationcode path. It uses the OAuthV2 policy with the
GenerateAuthorizationCode operation specified.
<OAuthV2 async="false" continueOnError="false" enabled="true" name="GetAuthCode">
    <DisplayName>GetAuthCode</DisplayName>
    <Operation>GenerateAuthorizationCode</Operation>
    <ExpiresIn>600000</ExpiresIn>
    <GenerateResponse/>
</OAuthV2>
The API call to obtain the authorization code is a GET and requires the query parameters client_id, response_type, and optionally scope and state, as shown in this example:
$curl http://myorg-test.apigee.net/oauth/authorizationcode?client_id={consumer_key}&response_type=code&scope=scope1%20scope2&state={some_string}
Get access token
This policy is attached to the /oauth/accesstoken path. It uses the OAuthV2
policy with the GenerateAccessCode operation specified. In this case, the grant_type parameter is
expected as a query param:
<OAuthV2 name="GetAccessToken">
    <Operation>GenerateAccessToken</Operation>
    <ExpiresIn>360000000</ExpiresIn>
    <SupportedGrantTypes>
        <GrantType>authorization_code</GrantType>
    </SupportedGrantTypes>
    <GrantType>request.queryparam.grant_type</GrantType>
    <GenerateResponse/>
</OAuthV2>
The API call to obtain the access code is a POST and must include the client_id, client_secret, grant_type=authorization_code, and, optionally, scope. For example:
$ curl https://{org_name}-test.apigee.net/oauth/accesstoken?grant_type=authorization_code -X POST -d 'client_id=bBGAQrXgivA9lKu7NMPyoYpVKNhGar6K&client_secret=hAr4Gn0gA9vAyvI4'
This is just a basic summary. A production example includes many other policies for building up URLs, doing transformations, and performing other tasks. Refer to the sample on GitHub for a complete, working project.
Attaching the verify access token policy
Attach a VerifyAccessToken policy (OAuthV2 policy with the VerifyAccessToken operation specified) to the beginning of any flow that accesses a protected API, so that it is executed whenever a request for a protected resources comes in. Apigee checks to be sure each request has a valid access token. If not, an error is returned. For the basic steps, see Verifying access tokens.
<OAuthV2 async="false" continueOnError="false" enabled="true" name="VerifyAccessToken">
    <DisplayName>VerifyAccessToken</DisplayName>
    <ExternalAuthorization>false</ExternalAuthorization>
    <Operation>VerifyAccessToken</Operation>
    <SupportedGrantTypes/>
    <GenerateResponse enabled="true"/>
    <Tokens/>
</OAuthV2>
Calling the protected API
To call an API that is protected with OAuth 2.0 security, you need to present a valid access token. The correct pattern is to include the token in an Authorization header, as follows: Note that the access token is also referred to as a bearer token.
$ curl -H "Authorization: Bearer UAj2yiGAcMZGxfN2DhcUbl9v8WsR" \
  http://myorg-test.apigee.net/v0/weather/forecastrss?w=12797282
See also Sending an access token.
